 Patrick Cooper
Key Takeaways
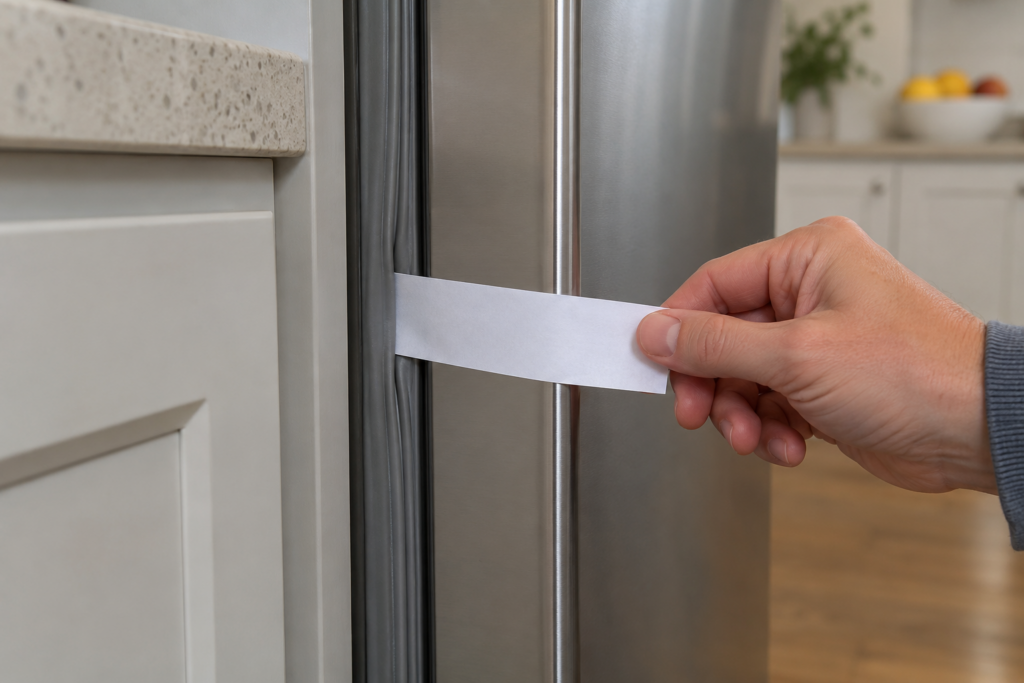
- Close a strip of paper in the door and pull it out at several points, because a gasket fails in places.
- A torn, cracked or compressed gasket lets warm air in and makes the compressor run overtime.
- Clean a supple, whole gasket with warm soapy water, and avoid petroleum-based cleaners.
- Replace a gasket that is cracked, torn, stiff or flattened, or that still fails the test after cleaning.
- A single bad gasket is a small repair and does not mean the refrigerator is at the end of its life.
The Bottom Line
Test the seal with paper before you suspect the compressor. A dirty gasket is cleaned and a damaged one is replaced, from $130 with labor on this site.
When a refrigerator is not cold enough, the first thought is the compressor, and the real cause is often a strip of rubber. The door gasket is the seal that keeps cold air in and warm, humid air out, and when it stops sealing, the refrigerator runs longer, warms unevenly and sometimes sets off its high-temperature alarm. A gasket costs a fraction of any cooling part, so it is the repair to rule in or out before the others. This guide covers how to test the seal, how to tell a gasket that can be cleaned from one that needs replacing and what the Electrolux refrigerator door gasket fix or replace choice means for the rest of the refrigerator. For the cooling faults beyond the seal, our refrigerator not cooling guide is the companion page.
| What you find | What it means | Fix or replace |
|---|---|---|
| Gasket is dirty or sticky, but supple and whole | Residue stops the seal from closing | Fix, clean it |
| Paper slides out easily in one spot only | A local gap, possibly from a dent or a crumb | Fix first, clean and recheck |
| Paper slides out all around the door | Gasket has lost its seal | Replace |
| Rubber is cracked, torn or stiff | Material has failed | Replace |
| Rubber is flattened or compressed in places | Permanent set from age | Replace |
| Seal is fine but the door still will not close fully | Alignment, level or an item in the way | Fix the cause, not the gasket |
How Do I Test a Refrigerator Door Gasket?
Close the door on a strip of paper or a dollar bill and try to pull it out. The site's maintenance guide gives this dollar bill test: if the bill slides out easily, the gasket needs attention or replacement, and if it drags, the seal is working at that spot.
The test has to be done around the whole door, because a seal fails in places, not all at once. Repeat it every few inches along the top, the sides and the bottom, and on both doors of a French door model.
- Test at the hinge side and the latch side — doors often seal at one edge and gap at the other.
- Test the bottom corners — the lowest corners collect crumbs and spills.
- Look for frost or condensation along the seal — moisture that gathers there points to a leak.
- Listen for the compressor — one that runs nearly all the time is working to make up for a leak.
Can a Leaking Gasket Make the Refrigerator Warm?
Yes. Our not-cooling guide says a torn, cracked or compressed gasket lets warm air in continuously, forcing the compressor to run overtime and potentially triggering the HI temperature alarm. A door that does not close fully can also set off the door alarm, which our refrigerator door alarm notice describes: the alarm sounds when a door has been open for more than two minutes, and if it continues with the door closed, the door switch may be faulty or the gasket is not sealing.
That makes the gasket worth checking before you spend on anything else. Compare the symptoms with the fan and condenser codes:
- Whole refrigerator slightly warm, compressor never rests — gasket, settings or condenser coils.
- SY EF or SY CF code — a fan fault, so the refrigerator SY CF page is the place to start.
- HI alarm after a door was left open — check the seal and the temperature settings.
- Frost on the door edge only — the usual sign of a leak at the seal.
When Should I Clean the Gasket and When Replace It?
Clean it when it is supple and whole, and replace it when it is cracked, torn, stiff or permanently flattened. The site's maintenance guide recommends washing the gaskets monthly with warm soapy water, drying them thoroughly and avoiding petroleum-based cleaners that can degrade the rubber. The not-cooling guide says to replace gaskets at the first sign of cracking or compression.
- Wash the gasket with warm soapy water, including the folds, where residue hides.
- Dry it thoroughly so it does not stick to the cabinet.
- Retest with paper all the way around.
- Replace it if the test still fails or the rubber is damaged.
A gasket that passes after cleaning is a fix. One that fails after cleaning is a replacement, and delaying it only pushes the cost onto the compressor.
Is Replacing the Gasket Cheaper Than Replacing the Refrigerator?
By a wide margin: our refrigerator repair costs guide lists a door gasket replacement from $130 with labor. A leaking gasket that is left alone makes the compressor work harder, and the same guide warns that a leaking seal shortens its life.
The decision for the whole refrigerator is separate. Our refrigerator repair or replace guide puts the average Electrolux refrigerator life at 12 to 17 years, and says seal deterioration together with control board problems or water leaks suggests a unit is nearing the end of its life. A single bad gasket is not that signal.
What to Do While You Wait for a Part
Keep the settings where the site recommends, 37°F in the fresh food compartment and 0°F in the freezer, check them with a thermometer and avoid opening the door more than you must. If the seal is leaking badly, move the most perishable food to the part of the refrigerator that stays coldest, and do not overstuff the shelves in a way that props the door open.
What a Replacement Involves
A new gasket is fitted to the door liner and the door is aligned so the seal closes evenly all the way around. The technician tests the seal again afterwards, and sets the compartment temperatures if they have drifted. The job is short, and it is a good moment to clean the coils and check the door hinges at the same time.
- Old gasket removed — the groove or retaining channel is cleaned first.
- New gasket seated — pressed in evenly along the whole perimeter.
- Seal retested — with the same paper test you used at home.
- Door alignment checked — so the new seal is not asked to cover a sagging door.
Give the refrigerator a few hours to recover its temperature after the work, and check the thermometer the next day. If the temperature is still high after a day, the seal was probably not the only fault, and the cooling checks in the not-cooling guide are the next step; the new gasket will not have wasted money, because a good seal is needed whatever else is wrong.
Booking the Repair
Gasket replacement, fan and coil work are part of our Electrolux refrigerator repair service. Tell us the model, which door leaks and what the paper test showed. Schedule a visit or contact us. The final price is confirmed after the on-site diagnosis, with a written estimate before any work begins.